


A rare introduction enhancement in Spring IntroductionAdvisor
When we usually do AOP development, we basically enhance a certain method and do something before or after a certain method is executed. This is called PointcutAdvisor. In fact, Advisors in Spring can be roughly divided into two types: In addition to PointcutAdvisor, there is another kind of Advisor called IntroductionAdvisor. Recently, I want to talk to my friends about the source code of Spring AOP. One prerequisite for looking at the source code is to first master the various usages of Spring. In this way, when looking at the source code, it is often There is a feeling of enlightenment, otherwise it would be easy to be confused when looking at the source code!
Contents
1. Practice
Different from PointcutAdvisor, this enhancement of IntroductionAdvisor is mainly for one class.
Next, Brother Song will write a simple case. Let’s take a look at what IntroductionAdvisor does.
Suppose I have an Animal interface as follows:
public  interface  Animal {
     void  eat () ;
}
This animal has the ability to eat.
Now I also have a Dog, as follows:
public  interface  Dog {
     void  run () ;
}
public  class  DogImpl  implements  Dog {
     @Override
    public  void  run () {
        System.out.println( "Dog run" );
    }
}
Dog has the ability to run. Note that there is no inheritance/implementation relationship between Dog and Animal.
Now, through the IntroductionAdvisor in Spring, we can make Dog have the ability of Animal. Let’s take a look at how to do it.
First, let’s develop an Advice, which is also an implementation class of the Animal interface , as follows:
public  class  AnimalIntroductionInterceptor  implements  IntroductionInterceptor , Animal {
     @Override
    public Object invoke (MethodInvocation invocation)  throws Throwable {
         if (implementsInterface(invocation.getMethod().getDeclaringClass())) {
             return invocation.getMethod().invoke( this , invocation.getArguments ());
        }
        return invocation.proceed();
    }

    @Override
    public  void  eat () {
        System.out.println( "Animal eat" );
    }

    @Override
    public  boolean  implementsInterface (Class<?> intf) {
         return intf.isAssignableFrom( this .getClass());
    }
}
Like ordinary AOP, when the target method is intercepted, the invoke method here will be triggered. In the invoke method, we need to call the implementsInterface method first to make a judgment. If the class to which the intercepted method belongs is Animal, that is, implementsInterface. If the method returns true (this is actually Animal), then just get the method object directly and call it through reflection. This will cause the eat method here to be triggered; otherwise, it means that it is the intercepted method itself. Then just call and invocation.proceed();let the interceptor chain continue to execute.
Next we define Advisor:
@Component
public  class  DogIntroductionAdvisor  implements  IntroductionAdvisor {
     @Override
    public ClassFilter getClassFilter () {
         return  new  ClassFilter () {
             @Override
            public  boolean  matches (Class<?> clazz) {
                 return Dog.class.isAssignableFrom(clazz);
            }
        };
    }

    @Override
    public  void  validateInterfaces ()  throws IllegalArgumentException {

    }

    @Override
    public Advice getAdvice () {
         return  new  AnimalIntroductionInterceptor ();
    }

    @Override
    public  boolean  isPerInstance () {
         return  true ;
    }

    @Override
    public Class<?>[] getInterfaces() {
         return  new  Class []{Animal.class};
    }
}
There are several methods that need to be implemented:
- getClassFilter: Which classes need to be intercepted and configured here. ClassFilter Song Ge has already talked about it in the previous article . Here, you only need to return the intercepted class. There is no need to specify which method is intercepted.
- getAdvice: This is to return the notification executed after interception. We can just return the notification defined previously. There is a requirement here, that is, this Advice needs to implement the Animal interface.
- getInterfaces: This method is also important. When generating a proxy object, the interfaces that the proxy object needs to implement are defined from this place. Animal is returned here, so in the future the proxy object I get will implement the Animal interface and I can call Animal. method.
- isPerInstance: This method is not implemented yet, just return true.
- validateInterfaces: This method is for interface verification, I will not verify it here.
Okay, my code is now written, let’s test it:
ClassPathXmlApplicationContext  ctx  =  new  ClassPathXmlApplicationContext ( "introduction.xml" );
 Dog  dog  = ctx.getBean(Dog.class);
dog.run();
System.out.println( "Animal.class.isAssignableFrom(dog.getClass()) = " + Animal.class.isAssignableFrom(dog.getClass()));
 Animal  animal  = (Animal) dog;
animal.eat();
The execution results are as follows:

The dog object we got is actually an Animal.
This is the IntroductionAdvisor in Spring AOP. When a class needs to have the capabilities of another class, the IntroductionAdvisor can be used.
2. Source code analysis
So how does this happen?
Because I mainly want to share the knowledge of IntroductionAdvisor with my friends in this article, so I won’t talk about the complete creation process of AOP. I will give you a detailed introduction in a subsequent article. I will talk to you today. Let’s talk about how the IntroductionAdvisor is processed during the execution of Spring AOP.
Creating a proxy object in Spring AOP is usually done through a post-processor, starting from the AbstractAutoProxyCreator#postProcessAfterInitialization method. The approximate sequence diagram is as follows:
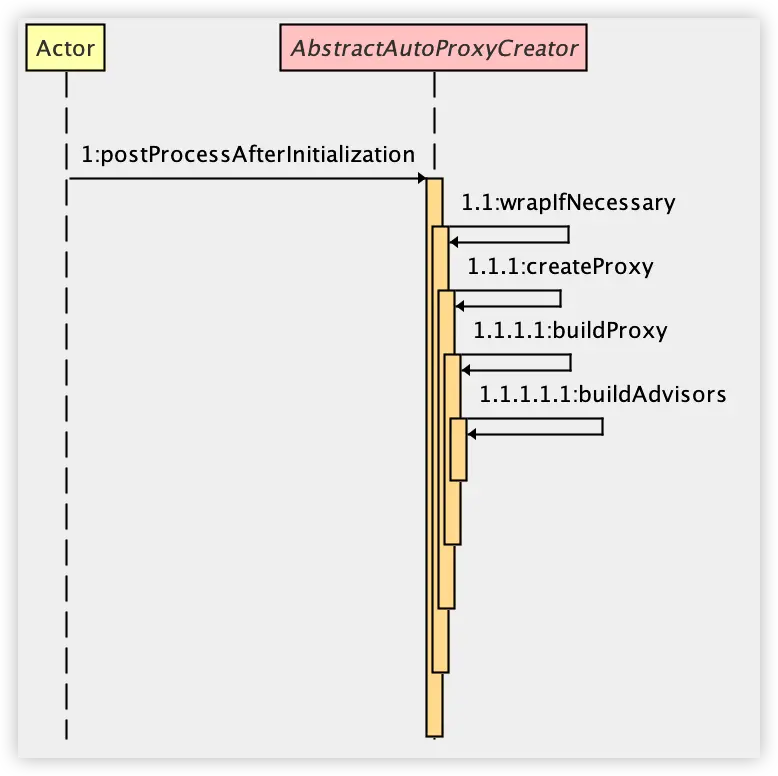
Let’s start with the buildProxy method. As you can see from the name, this method is used to build proxy objects.
AbstractAutoProxyCreator#buildProxy:
private Object buildProxy (Class<?> beanClass, @Nullable String beanName,
         @Nullable Object[] specificInterceptors, TargetSource targetSource, boolean classOnly) {
     //...
    Advisor[] advisors = buildAdvisors(beanName, specificInterceptors);
    proxyFactory.addAdvisors(advisors);
    //...
    return (classOnly ? proxyFactory.getProxyClass(classLoader) : proxyFactory.getProxy(classLoader));
}
There is a buildAdvisors method here. This method is used to process Advisor. Our customized DogIntroductionAdvisor will be read here and then added to the proxyFactory object. During the adding process, some additional processing will be performed. proxyFactory#addAdvisors will eventually come to the AdvisedSupport#addAdvisors method:
public  void  addAdvisors (Collection<Advisor> advisors) {
     if (!CollectionUtils.isEmpty(advisors)) {
         for (Advisor advisor : advisors) {
             if (advisor instanceof IntroductionAdvisor introductionAdvisor) {
                validateIntroductionAdvisor(introductionAdvisor);
            }
            this .advisors.add(advisor);
        }
        adviceChanged();
    }
}
Here all Advisors will be traversed to determine whether the type is of IntroductionAdvisor type. Our customized DogIntroductionAdvisor happens to be of IntroductionAdvisor type, so the validateIntroductionAdvisor method will be further called, as follows:
private  void  validateIntroductionAdvisor (IntroductionAdvisor advisor) {
    advisor.validateInterfaces();
    Class<?>[] ifcs = advisor.getInterfaces();
    for (Class<?> ifc : ifcs) {
        addInterface(ifc);
    }
}
public  void  addInterface (Class<?> intf) {
     if (! this .interfaces.contains(intf)) {
         this .interfaces.add(intf);
        adviceChanged();
    }
}
Friends, if you take a look, advisor.getInterfaces();we actually call the getInterfaces method in our customized DogIntroductionAdvisor, so the Animal interface will be returned here, and then the Animal interface will be stored in the interfaces variable. When the AOP object is generated in the future Will be used.
Okay, now back to the buildProxy method, this method will eventually be executed to the proxyFactory.getProxy method. When this method is finally executed, it will be either a JDK dynamic proxy or a CGLIB dynamic proxy. Let’s talk about them separately.
2.1 JDK dynamic proxy
First, if it is a JDK dynamic proxy, then the proxyFactory.getProxy method needs to build a JdkDynamicAopProxy, as follows:
public  JdkDynamicAopProxy (AdvisedSupport config)  throws AopConfigException {
     this .advised = config;
     this .proxiedInterfaces = AopProxyUtils.completeProxiedInterfaces( this .advised, true );
    findDefinedEqualsAndHashCodeMethods( this .proxiedInterfaces);
}
The parameter config contains the interface we mentioned earlier to be implemented, so what is stored in the proxiedInterfaces variable here is the interface that the proxy object will implement in the future. Taking our previous code as an example, the value of proxiedInterfaces here is as follows:

As you can see, the Animal interface is included.
Finally, call the JdkDynamicAopProxy#getProxy method to generate a proxy object, as follows:
@Override
public Object getProxy ( @Nullable ClassLoader classLoader) {
     return Proxy.newProxyInstance(classLoader, this .proxiedInterfaces, this );
}
This is the JDK dynamic proxy that everyone is familiar with. As you can see, the generated proxy object has five interfaces. The generated proxy object is not only an instance of Dog and Animal, but also an instance of SpringProxy and so on. Now everyone understands why the dog object we got can be forcibly converted into Animal.
2.2 CGLIB dynamic proxy
Let’s look at the implementation logic of CGLIB dynamic proxy. It’s actually similar:
public  CglibAopProxy (AdvisedSupport config)  throws AopConfigException {
     this .advised = config;
     this .advisedDispatcher = new  AdvisedDispatcher ( this .advised);
}
@Override
public Object getProxy ( @Nullable ClassLoader classLoader) {
     return buildProxy(classLoader, false );
}
private Object buildProxy ( @Nullable ClassLoader classLoader, boolean classOnly) {
     //...
    enhancer.setSuperclass(proxySuperClass);
    enhancer.setInterfaces(AopProxyUtils.completeProxiedInterfaces( this .advised));
     //...
    // Generate the proxy class and create a proxy instance.
    return (classOnly ? createProxyClass(enhancer) : createProxyClassAndInstance(enhancer, callbacks));
}
As you can see, the idea is similar to that in the JDK. The interface settings are extracted from advised. Advised is also passed in when the CglibAopProxy object is constructed.
3. Summary
Okay, now you guys should understand what IntroductionAdvisor is, right? To put it bluntly, when generating the proxy object, we also take into account the interface we set in the Advisor. The generated proxy object is also the implementation class of the interface. Of course, it must also be implemented in the Advice we provide. This interface, otherwise the proxy object will report an error when it executes the methods in the interface and cannot find the specific implementation.